
Homemade Ice Cream Recipe (Only 3 Ingredients!)


Founder / Chef / Everyone’s Best Friend
Andy Hay
Welcome to my kitchen. I hope to inspire you to grow as a home cook!
My childhood involved a lot of biking to the cornerstore and getting those scoops of ice cream out of the buckets. And my kids love that too, but a new memory is being unlocked, because we’ve started to make our own ice cream! We don’t have a fancy ice cream maker, and we don’t have the attention to churn it… but we’ve discovered that a scoop of homemade vanilla ice cream on a sunny day—or really, any day that ends in “y” can’t be beat. This homemade ice cream recipe using just three ingredients? It absolutely blew my mind. I’ve seen a few churn-free recipes float around over the years and always wondered if they actually held up. Could a no-churn ice cream recipe really match the creamy texture of the real deal?
Well, folks, I’ve tested it out, and I’m here to report: this is not only the easiest homemade ice cream I’ve ever made, it’s also incredibly delicious. The kicker? No ice cream machine required. Just a few basic ingredients, a bit of whipping, and some time in the freezer, and you’re off to the races. If you’re wondering how to make ice cream 3 ingredient-style, you’ve landed in the right place.


Ingredients:
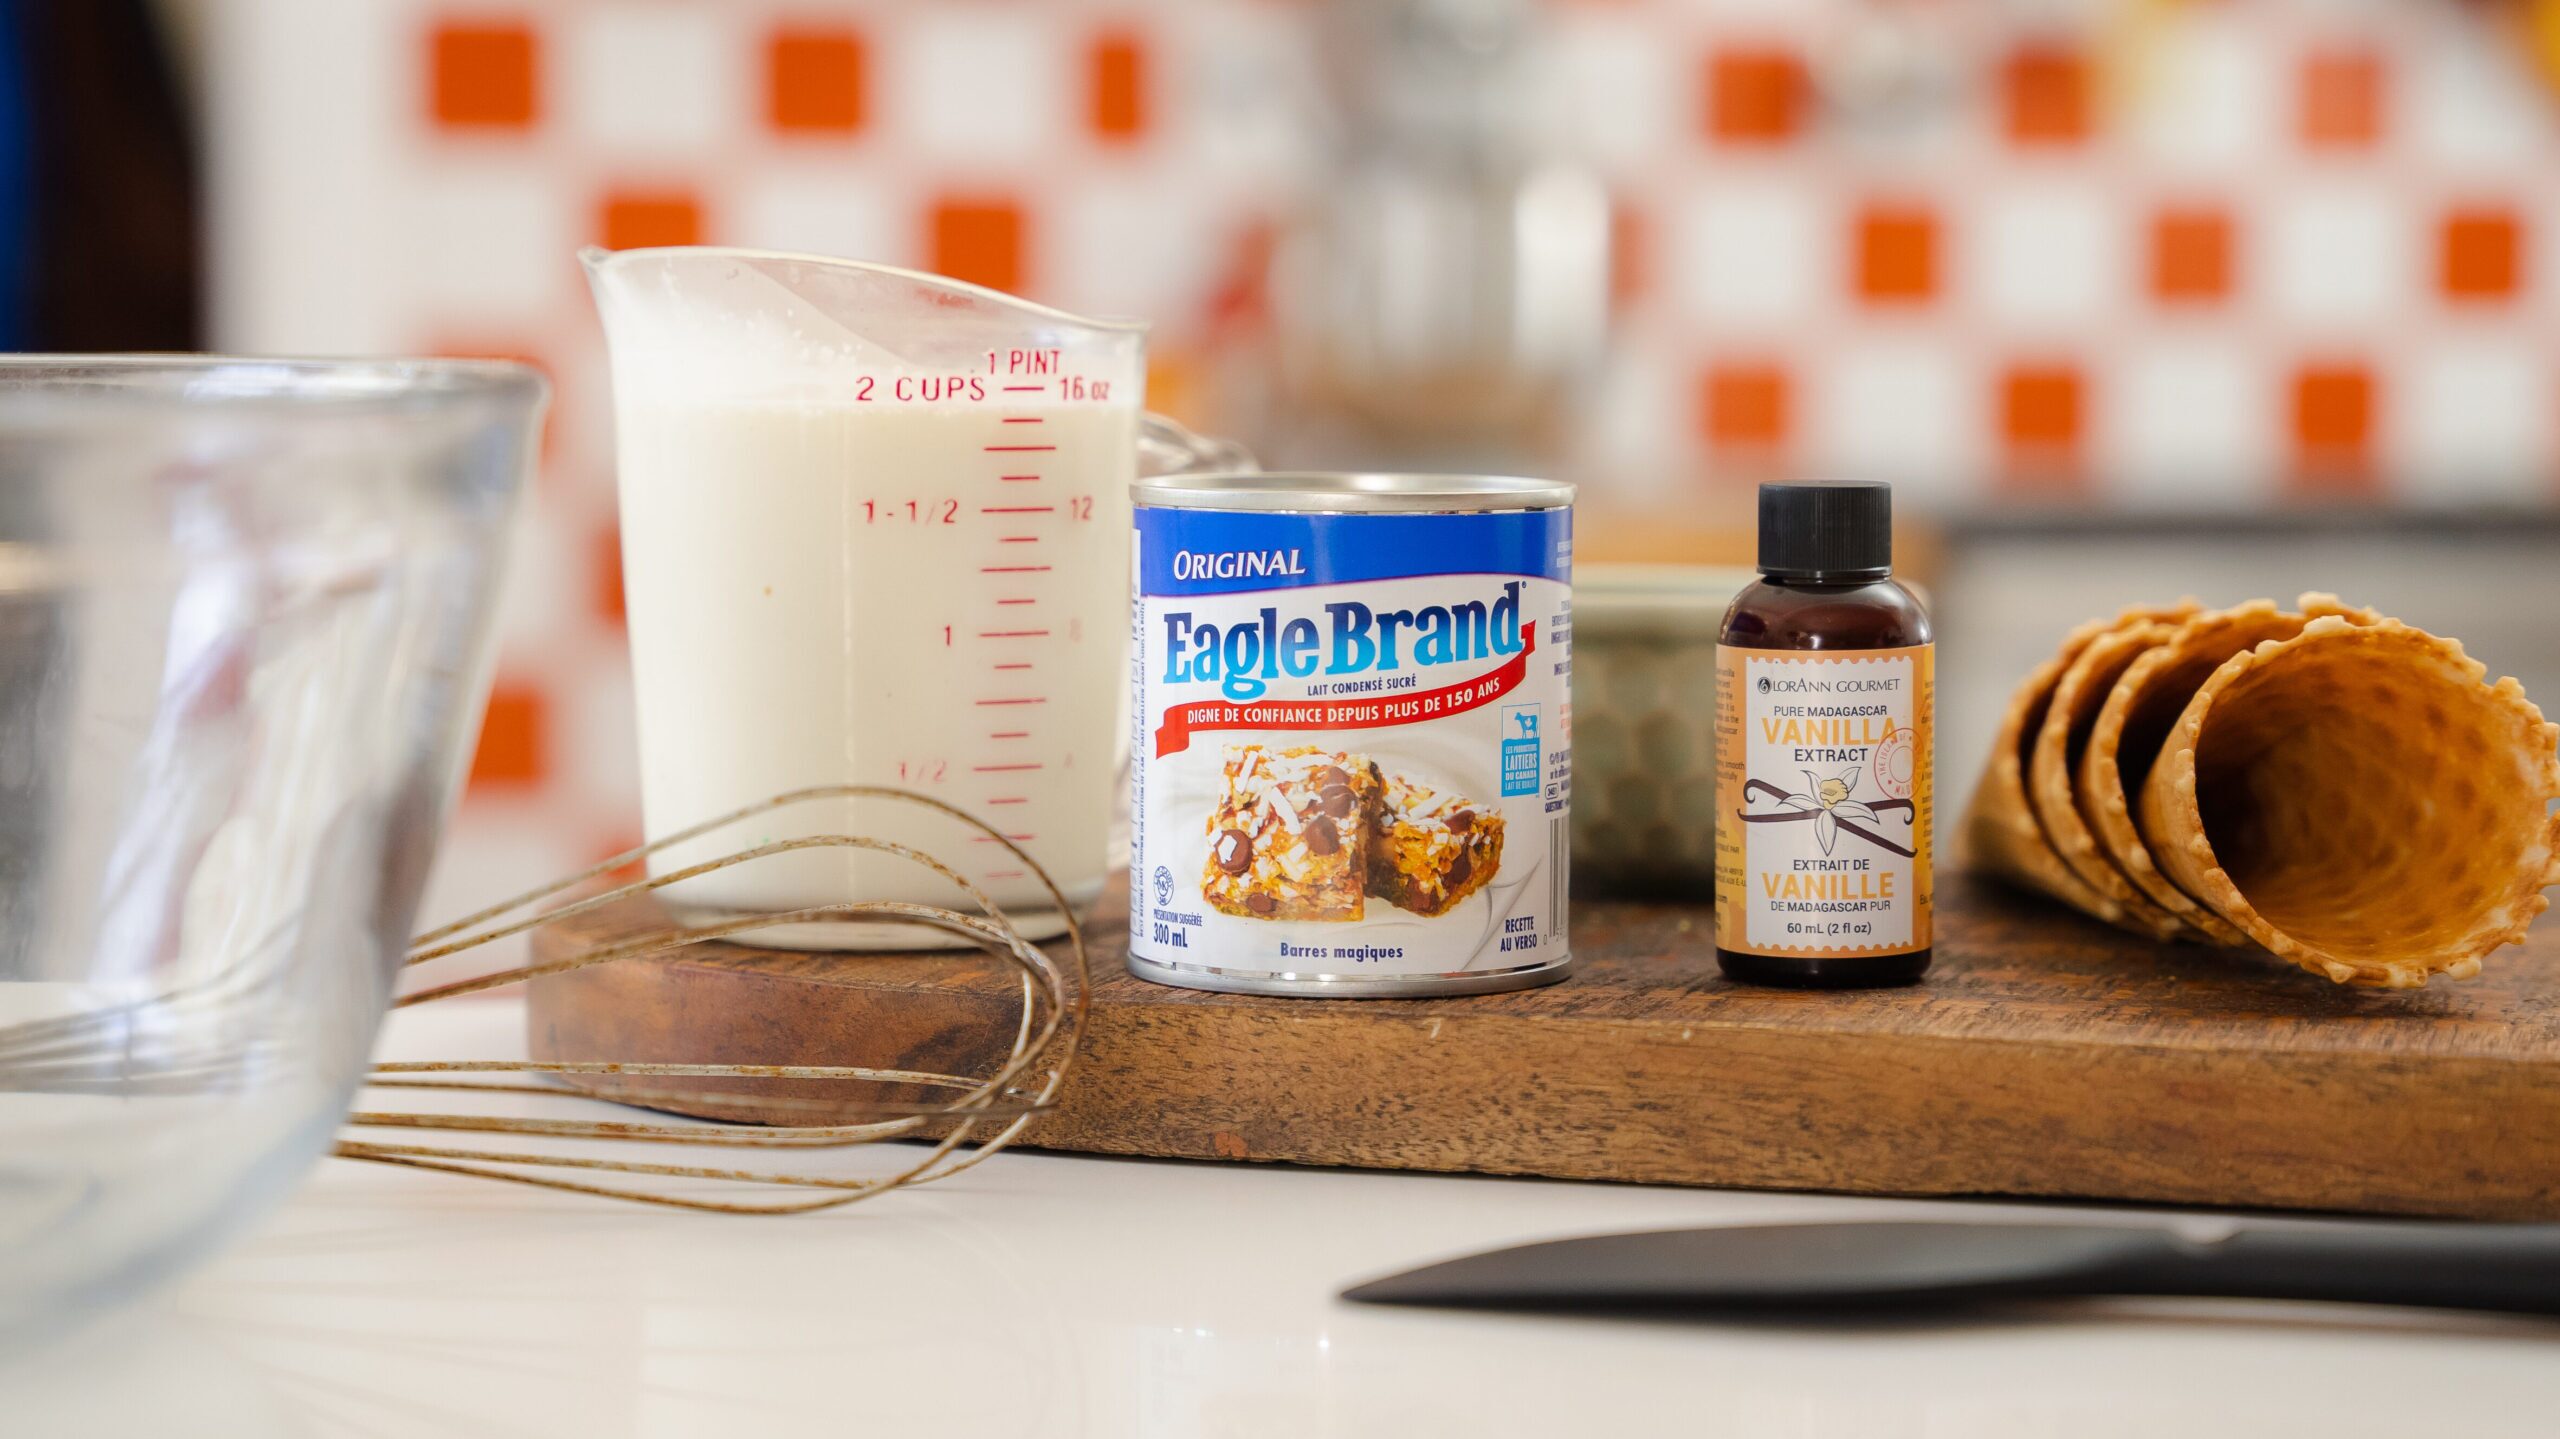
- 2 cups heavy cream
- 1 can sweetened condensed milk 300ml can size
- 2 tsp vanilla extract
Optional flavouring
- 1 cup Oreo cookies, crumbled
Instructions:
- Using a stand or hand mixer, whisk whipping cream for about 2 minutes. You want to create a stiff cream so don't rush this. Set aside
- In a separate bowl whisk together the sweetened condensed milk and vanilla.
- Scoop out 50% of the whipped cream into the condensed milk bowl. Using a rubber spatula gently fold the whipped cream into the condensed milk. Be gentle as we don't want to crush the whipped cream and force the air out.
- Fold the whipped cream + condensed milk combo into the remaining whipped cream. Fold gently and mix.
- Fold in your favourite add-ins—Oreos, chocolate chips, you name it.
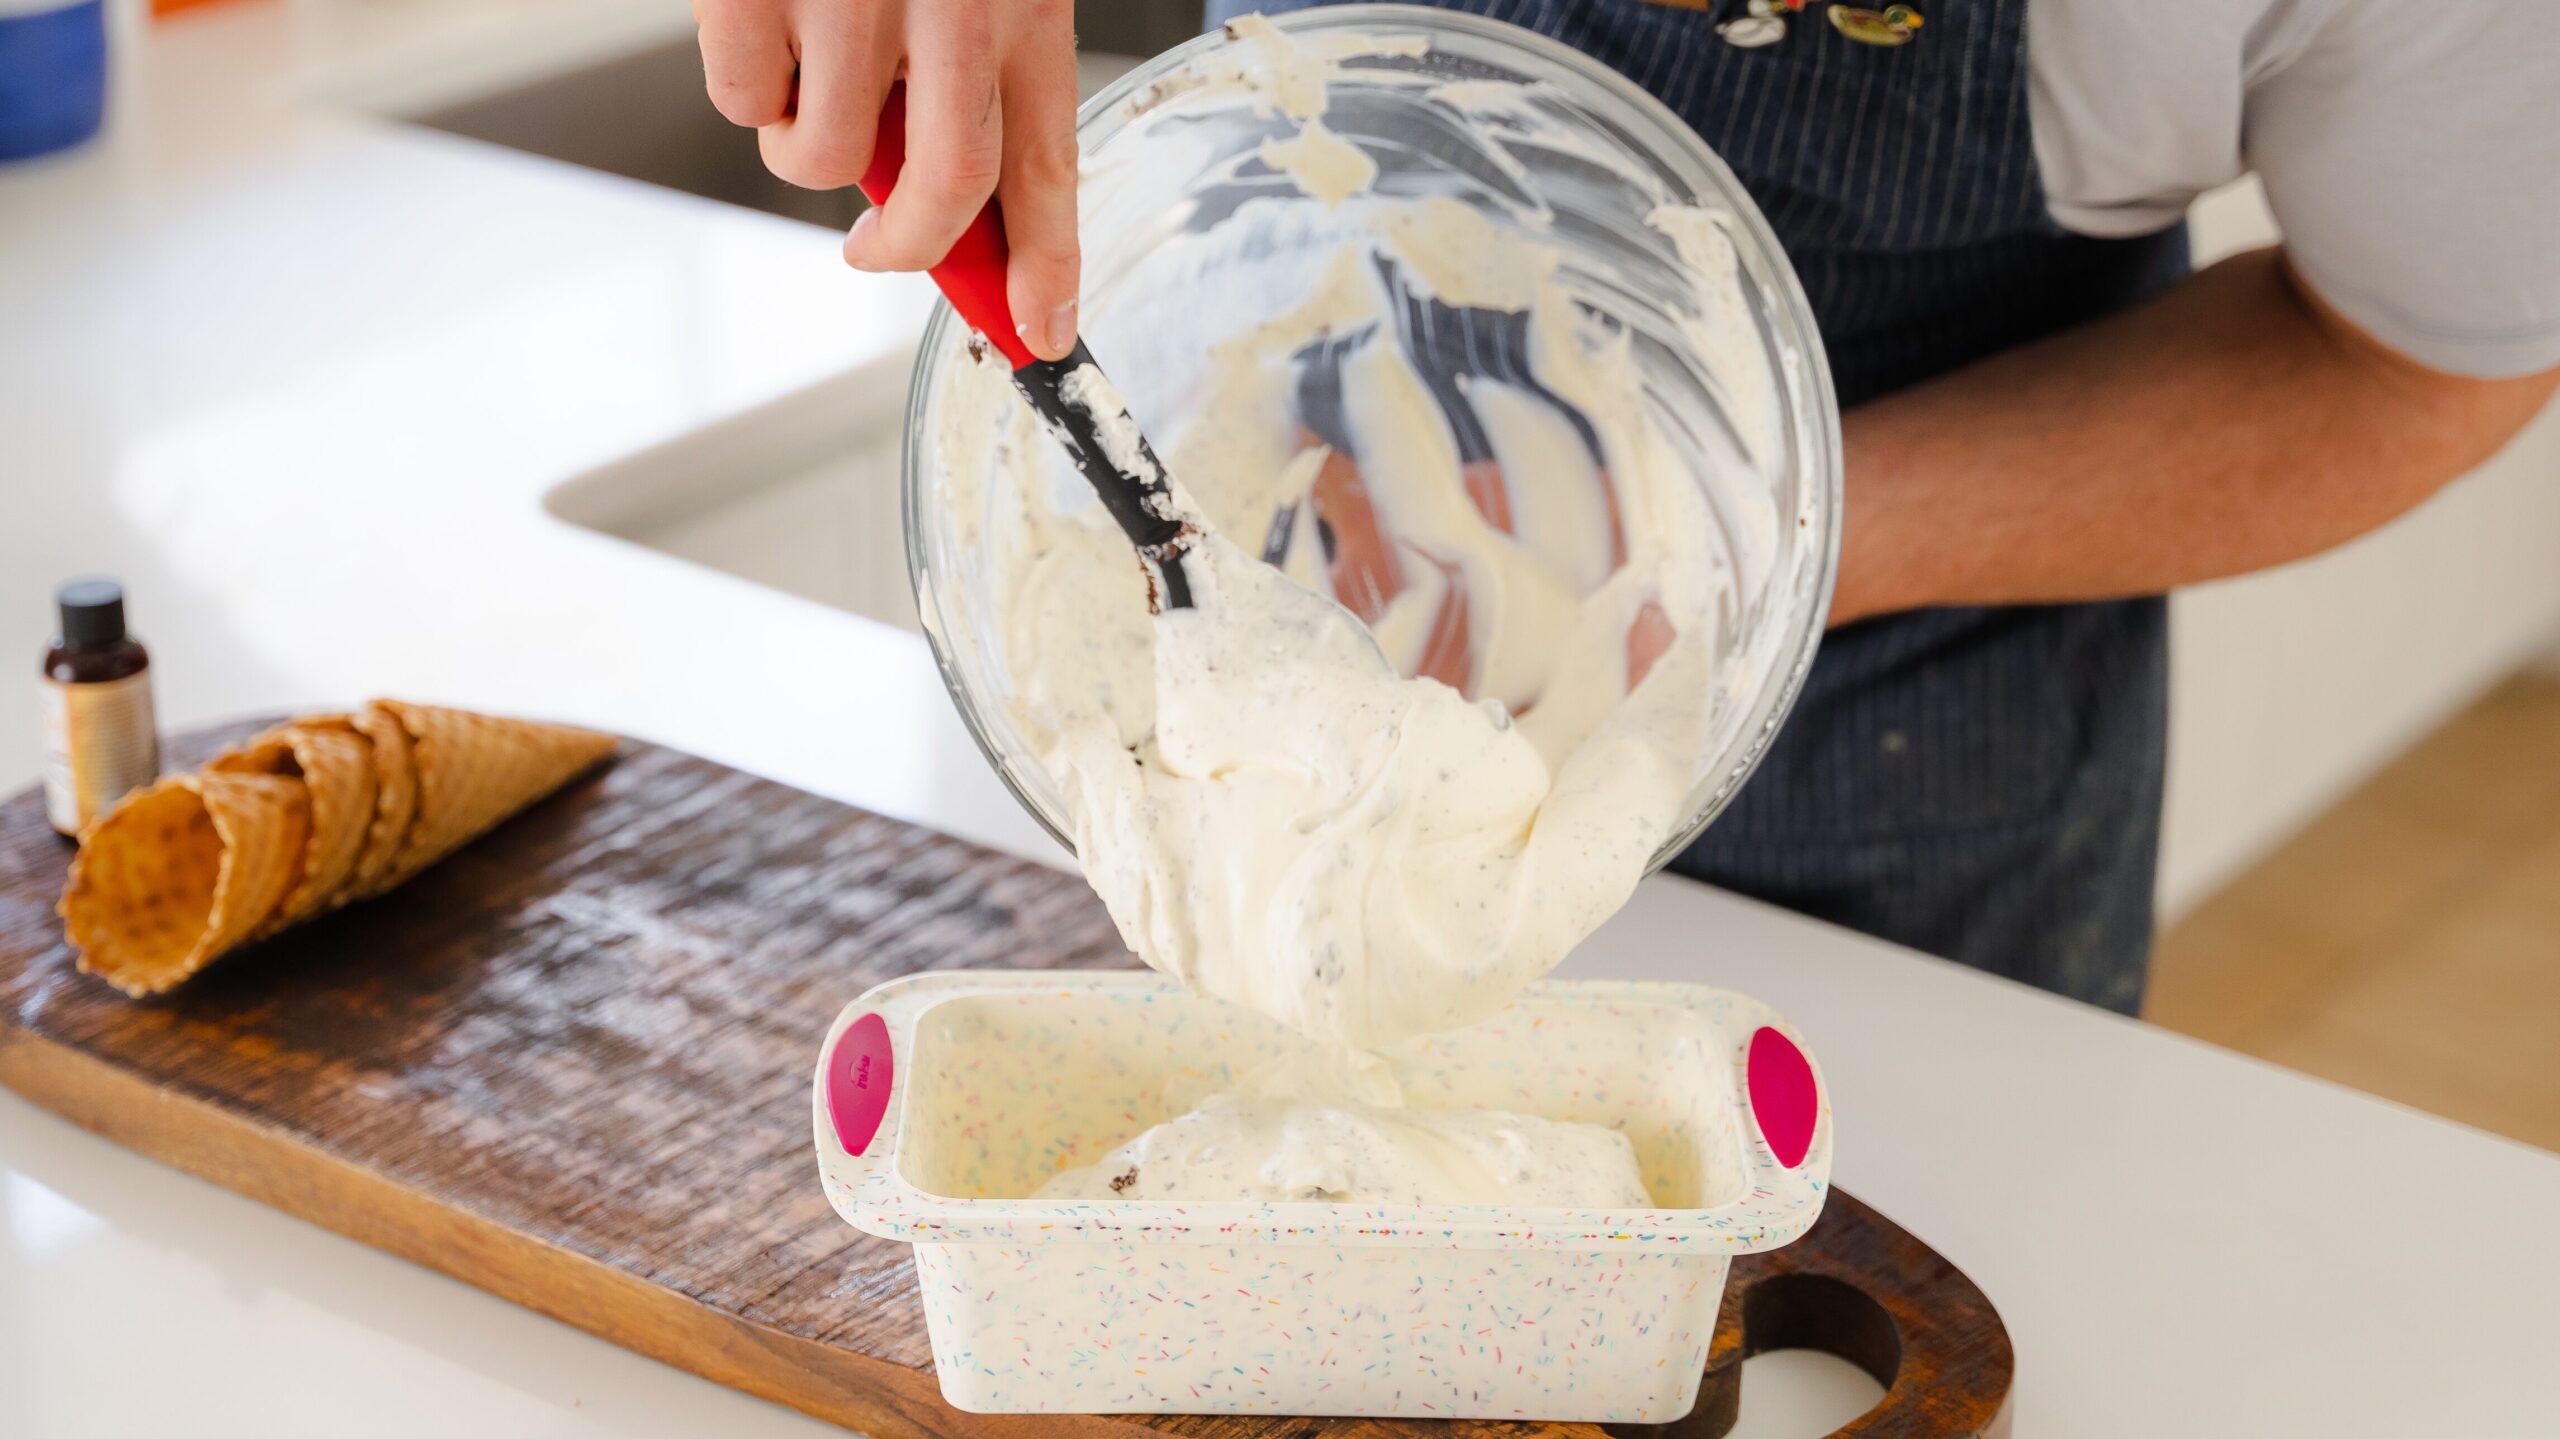
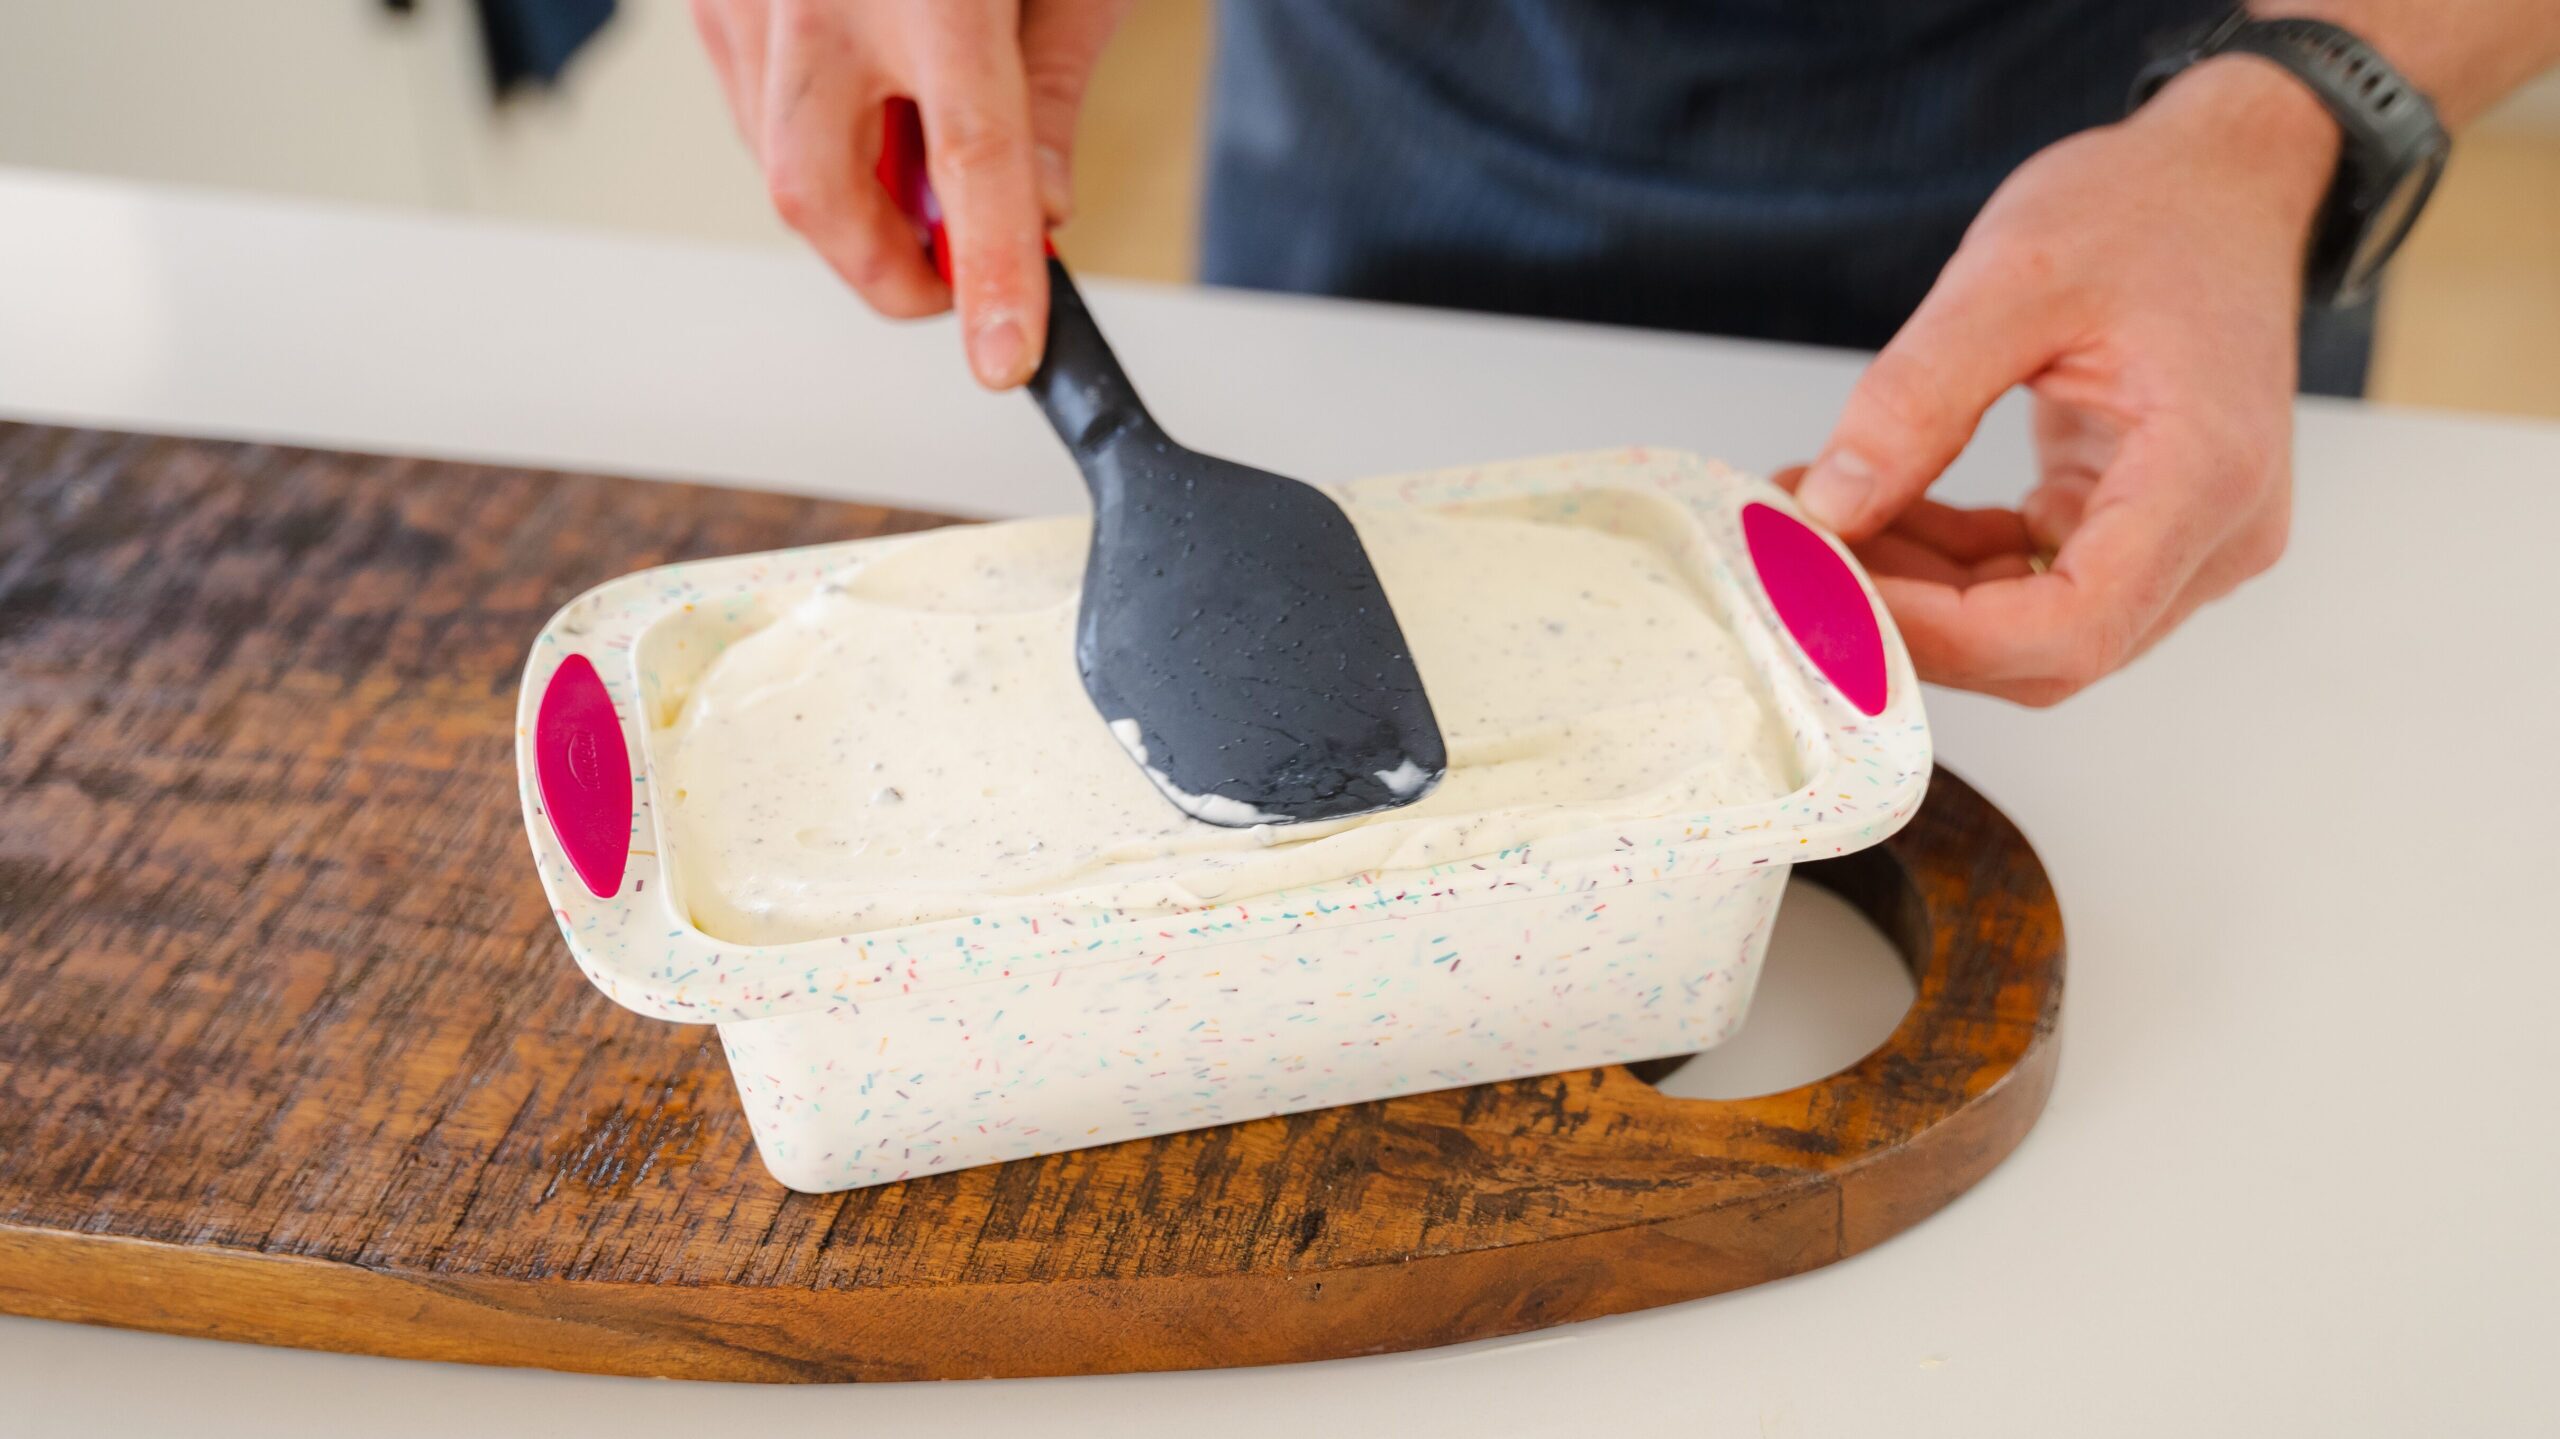
- Pour the mixture into a 5X9 inch loaf pan, cover with cling wrap and place into the freezer for 3 hours.
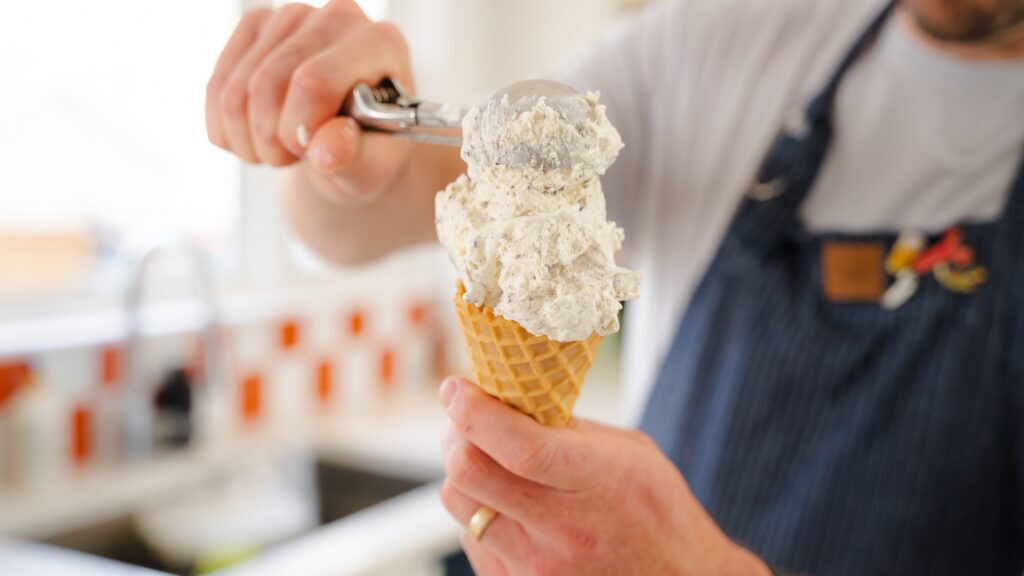
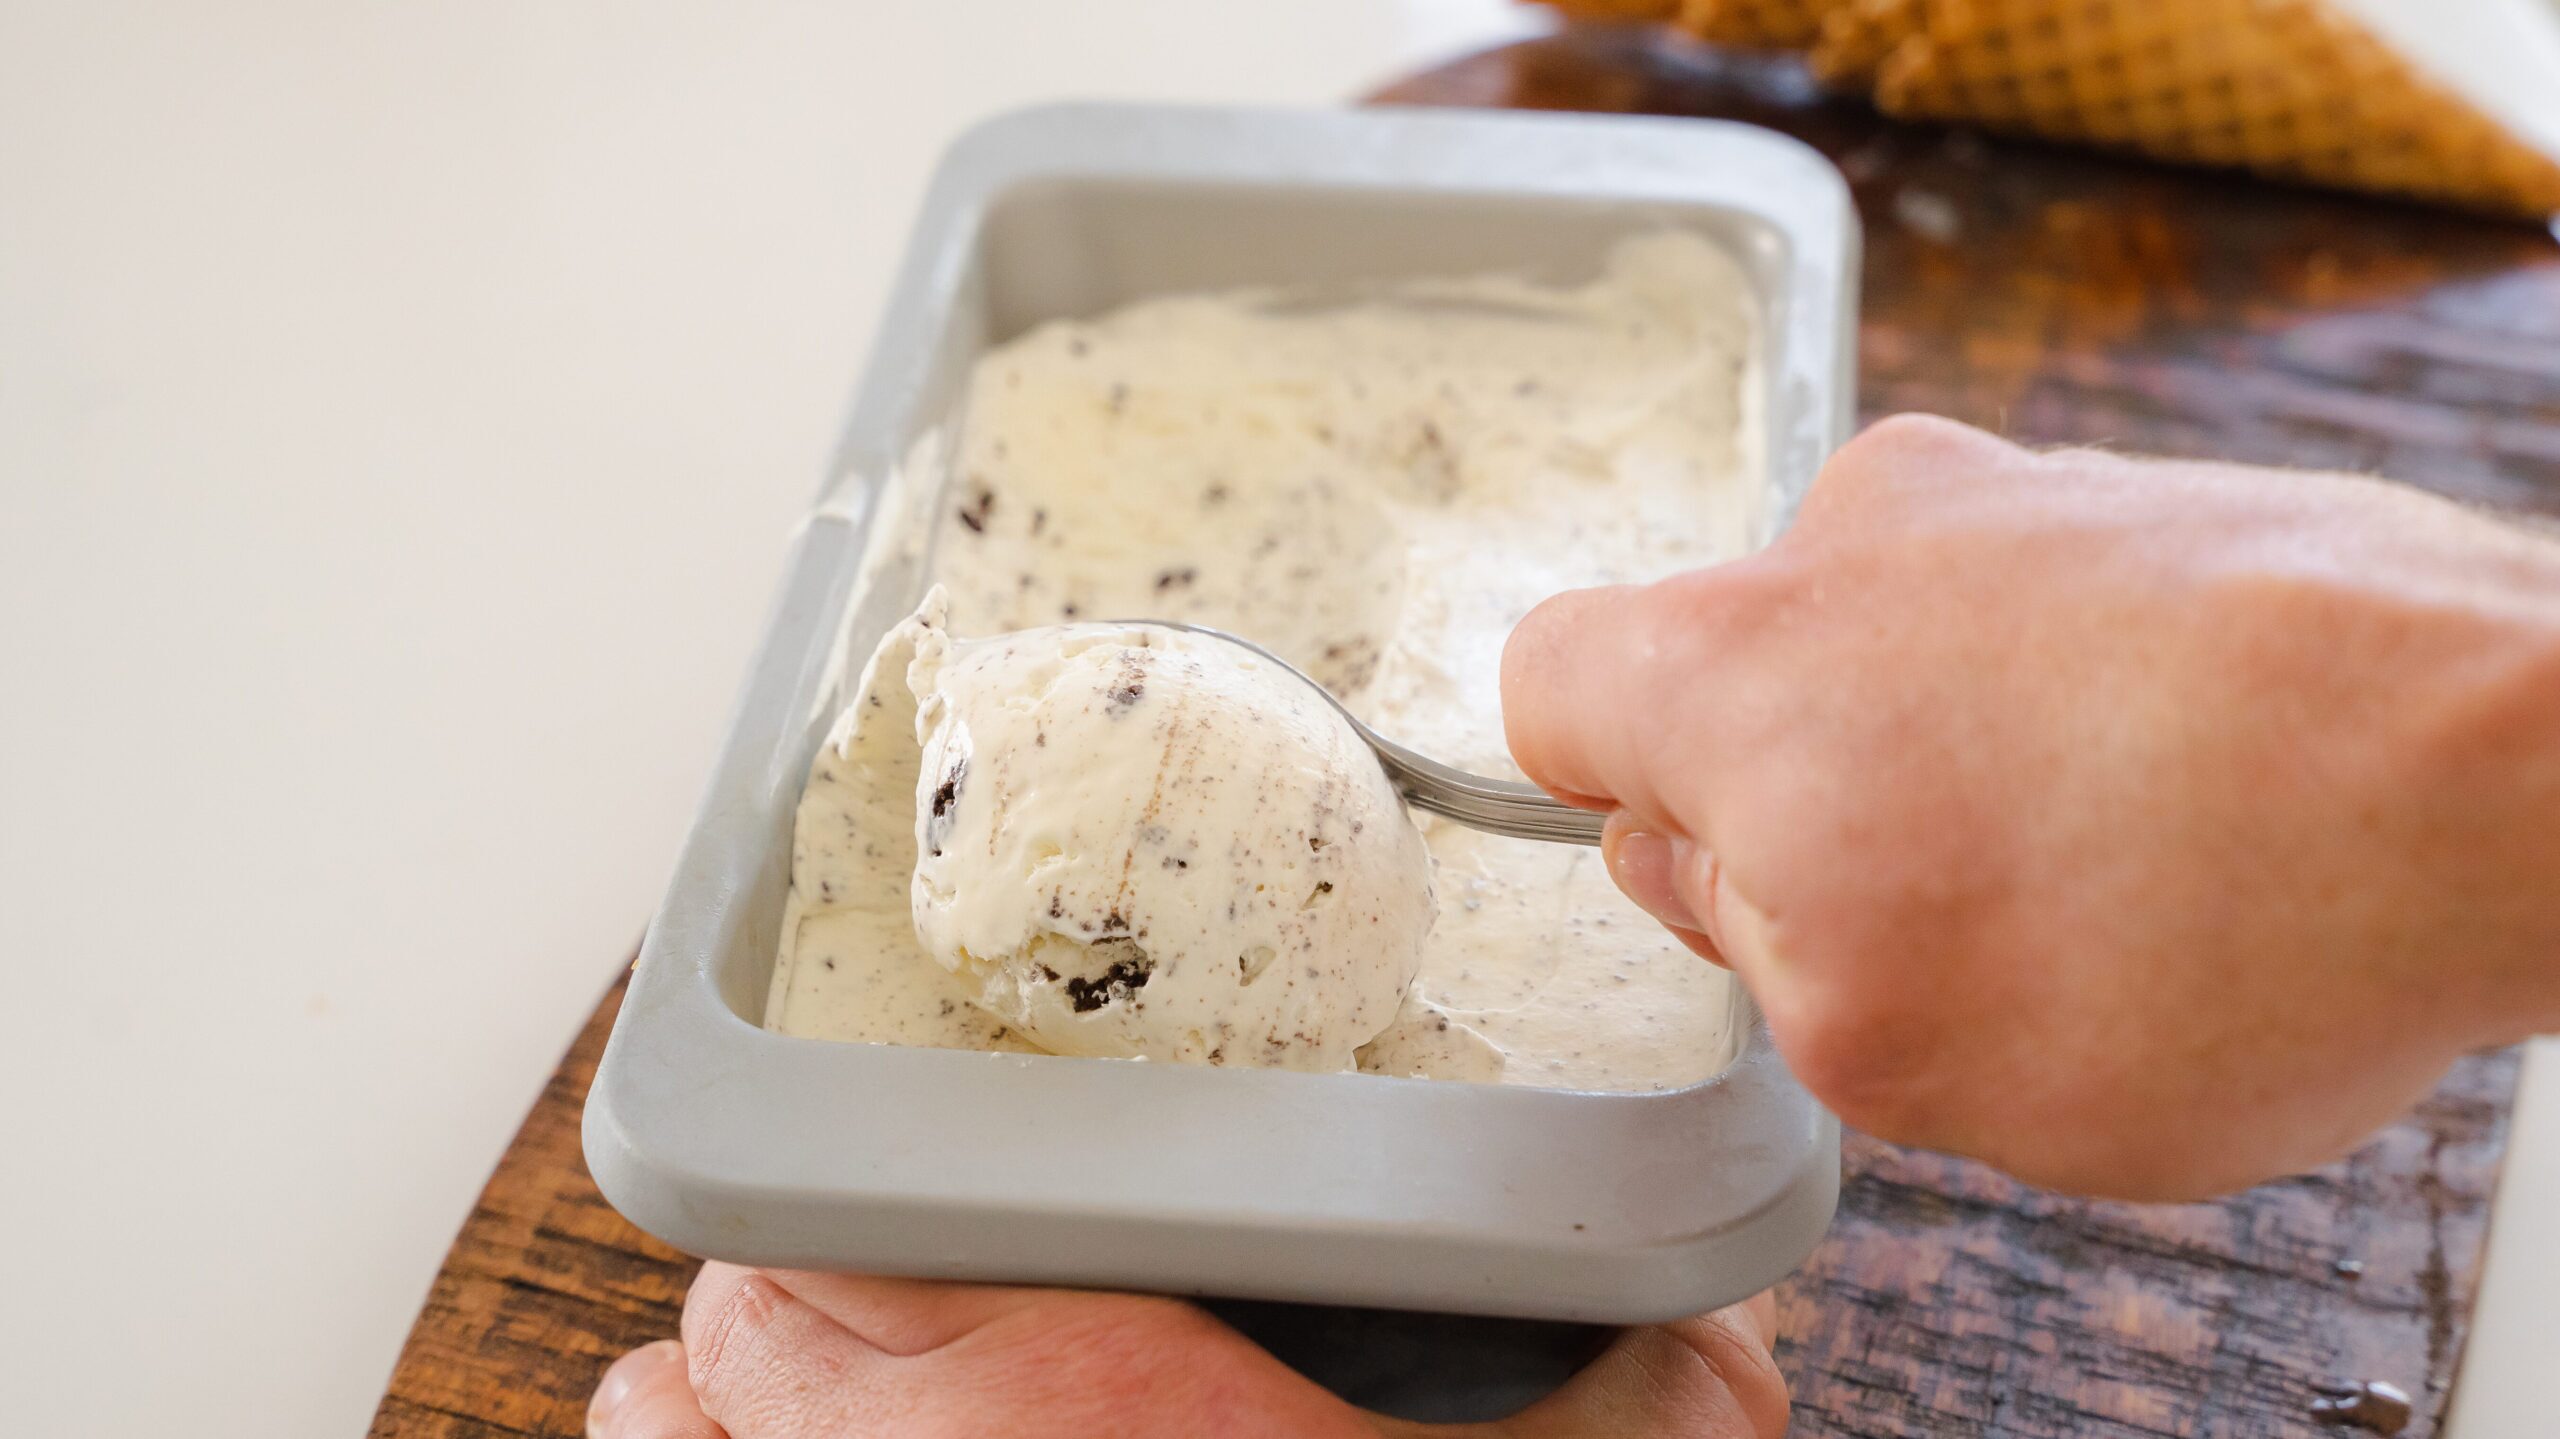
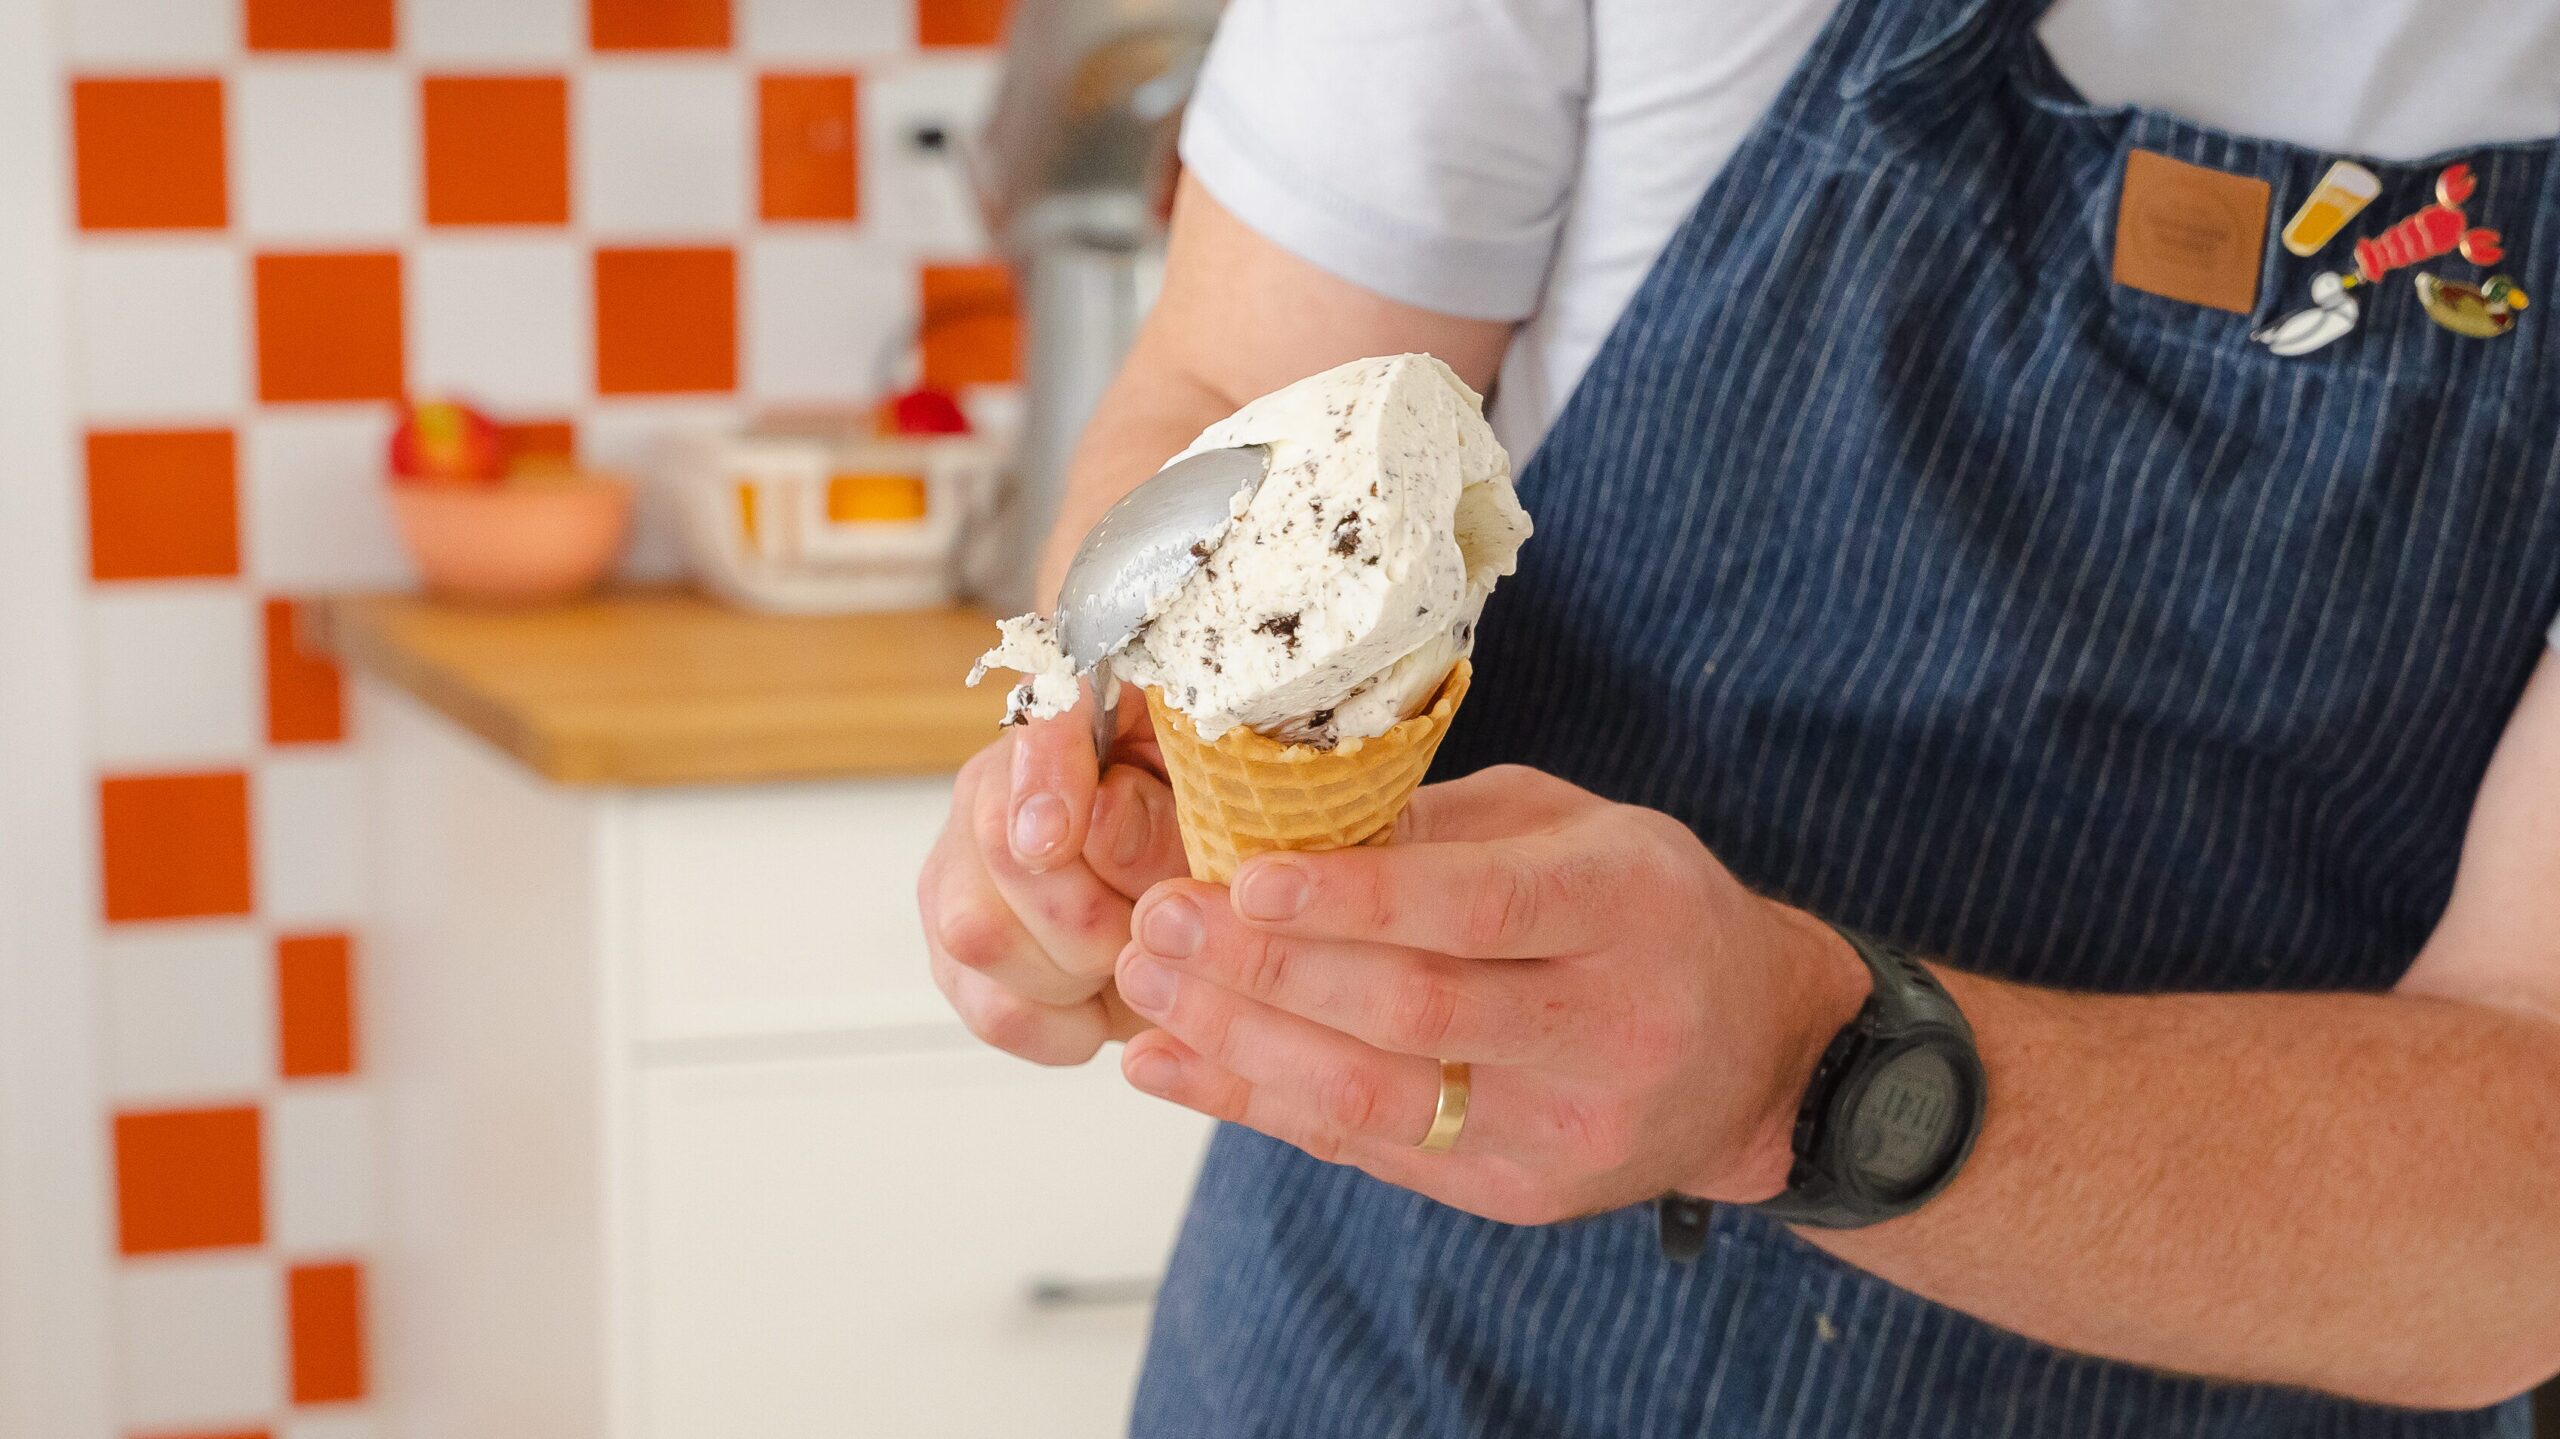
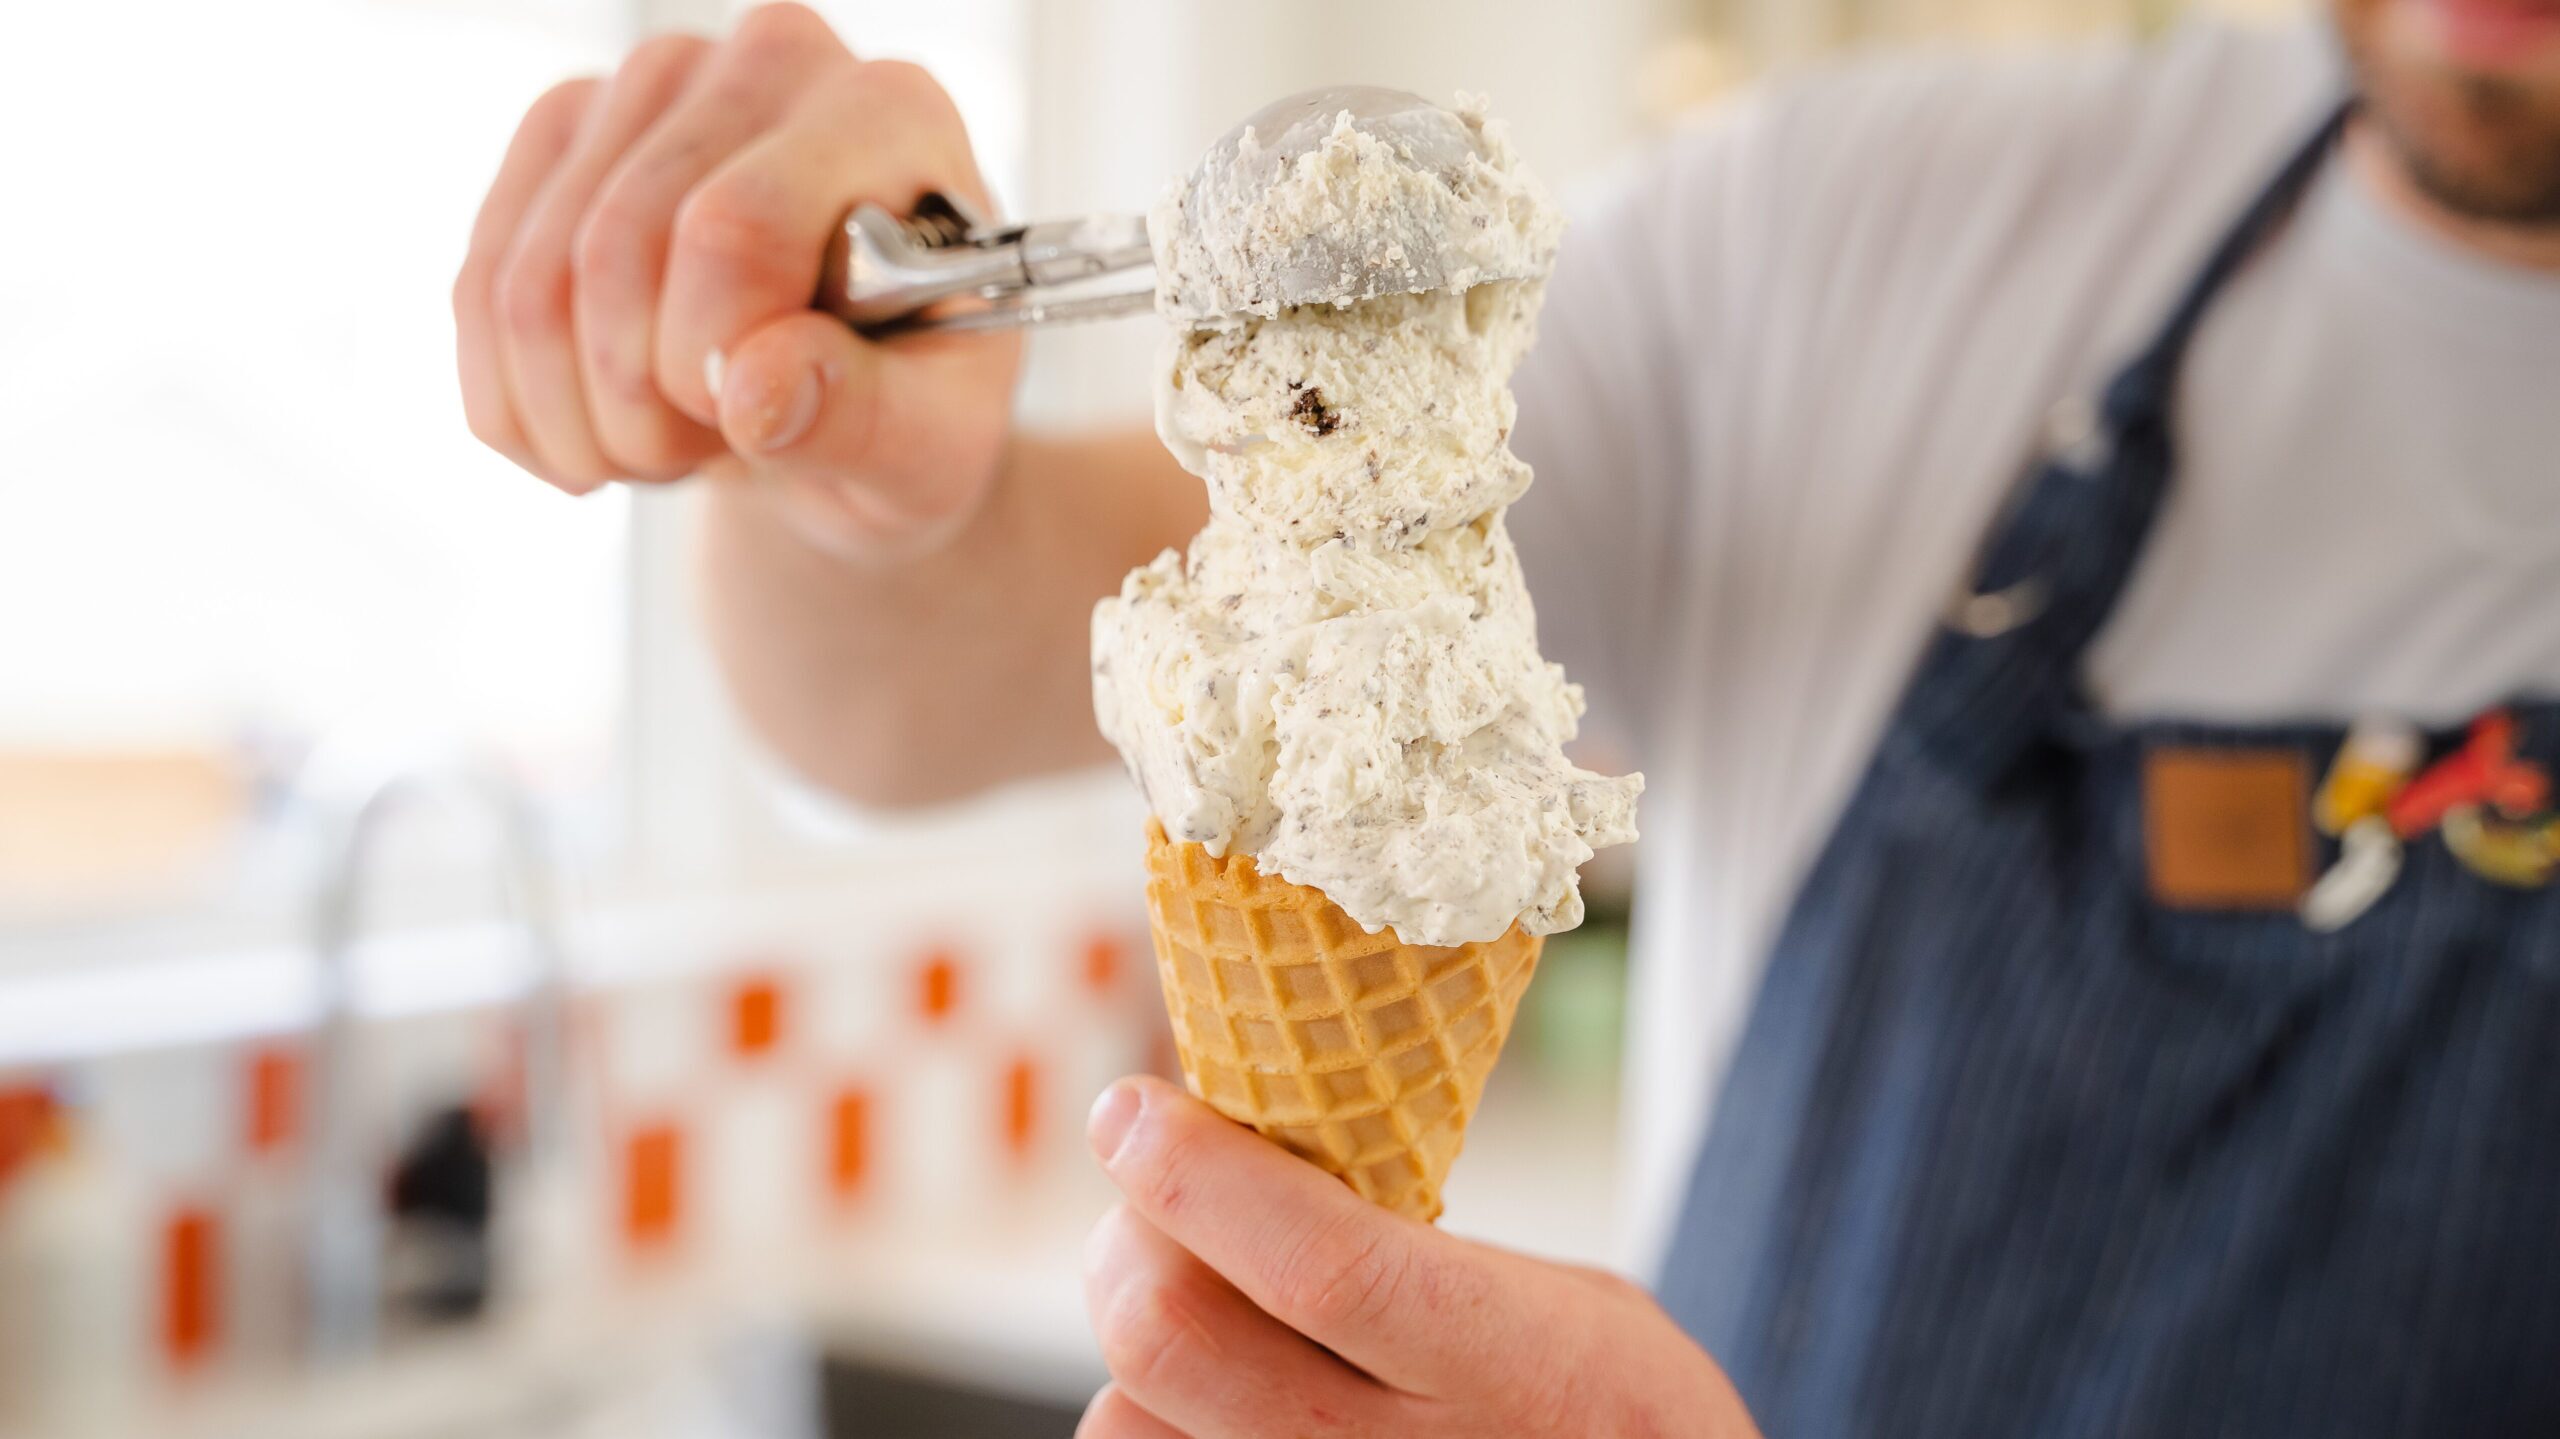
- Remove and scoop into waffle cones. Treat yourself to the good ones 🙂
The Ice Cream Base That Changed the Game
The magic starts with just three simple ingredients: heavy cream, sweetened condensed milk, and vanilla extract. That’s it. No eggs, no stovetop custard, no fancy equipment. The heavy whipping cream gives it that luxurious, rich texture, while the sweetened condensed milk brings the sweetness and helps keep it scoopable straight out of the freezer. When you’re whipping you want to whip the cream to stiff peaks. Don’t over whip it (you’ll see some cuddling and it’ll turn into butter). But whip it long enough that there’s really good structure. That structure is going to help you hold everything together, and once you start to fold in the rest you’ll really want that extra structure. Add a splash of pure vanilla extract (or even real vanilla bean if you’re feeling fancy), and you’ve got the perfect homemade vanilla ice cream base.
This homemade vanilla ice cream base is dreamy on its own, but the real fun starts when you add your favorite mix-ins or extracts. It’s like building your own custom pint without needing a churn recipe or dealing with traditional ice cream makers.

Let’s Talk Equipment—Or Lack Thereof
You do not need an ice cream machine or anything fancy to pull this off. If you’ve got a stand mixer, set it to medium speed and whip your cream until stiff peaks form. No stand mixer? A hand mixer works just fine too. Even a good old-fashioned whisk will get the job done—it might take a few extra minutes and some elbow grease, but hey, that just makes the first bite taste even better.
Use a large bowl for whipping so things don’t get messy, and when it comes time to combine the ingredients, make sure to gently fold the whipped cream into the condensed milk mixture to preserve all that airy volume—this step is key to achieving that light, creamy texture we all love in homemade vanilla ice cream.
The Secret to Smooth, Creamy Texture
One of the biggest concerns with any no churn ice cream recipe is texture. Nobody wants grainy ice cream, right? That’s where whipping the cream to stiff peaks comes in—it’s what keeps this recipe silky smooth and full of body. Another tip? Be gentle when you fold the ingredients together. Don’t overmix. You want the whipped cream to stay fluffy and airy so that the final ice cream mixture freezes up creamy instead of icy.
And while we’re on the topic—cover your loaf pan with plastic wrap before freezing. This keeps air and moisture out, helping to avoid those dreaded ice crystals. For best results, store your ice cream in an airtight container if you’re not devouring it all in one sitting (no judgment if you do).
Getting Creative with Homemade Ice Cream Flavors
The beauty of this homemade ice cream base is how customizable it is. I started with crushed Oreo cookies because that’s what my daughter was craving, and let me tell you, it was a huge win. But don’t stop there—this is your canvas. Here are a few other delicious add-ins and flavor combos to consider:
- Chocolate Chips or Chunks: Classic and always welcome. Stir in a handful before freezing for a bit of crunch.
- Peanut Butter Swirl: Add dollops of peanut butter and swirl with a spoon for that sweet-salty hit.
- Caramel Sauce: Drizzle it on top or swirl it right into the ice cream mixture.
- Fresh Strawberries or Blueberries: For a fruit-forward vibe, fold in chopped berries for a homemade ice cream recipe that tastes like summer.
- Cocoa Powder: Want a chocolate base? Add a few tablespoons to your whipped cream for a rich chocolate version.
- Sprinkles & Candy Bars: Perfect for a birthday vibe or just when you’re feeling fun.
You can also explore seasonal flavors—think mini eggs for Easter or crushed candy canes for the holidays. Got some leftover cookies? Crumble them in. Feeling citrusy? Try lemon zest and fresh blueberries. The possibilities are endless.
How to Make Ice Cream Without Churns or Custards
Traditional homemade ice cream recipes often call for eggs, sugar, and a carefully cooked custard base. That method is great if you’re into precision and have the time—but let’s be honest, sometimes we just want dessert to be easy. This 3-ingredient method is perfect for those times when you’re craving something cold, creamy, and homemade without needing a churn ice cream recipe or ice cream makers.
You’re skipping the eggs and the custard, but not skipping on flavor or texture. In fact, this might just become your go-to dessert when guests pop by or when you need a freezer-friendly treat to keep on hand.
Storage Tips and Serving Suggestions
Once you’ve folded everything together and poured your ice cream mixture into a loaf pan, cover it with plastic wrap and let it hang out in the freezer for at least four hours. Overnight is even better if you can wait that long. When it’s ready, you’ll be greeted by creamy, scoopable homemade ice cream that tastes like it came from a fancy shop.
To serve, grab your favorite cones, bowls, or just a big spoon and go straight from the pan. Add some caramel sauce or sprinkles on top if you’re feeling extra. This is also a great dessert to pile onto cakes, brownies, or even your favorite summer desserts.
Final Thoughts
This no churn, 3-ingredient homemade ice cream recipe is the real deal. It’s got that perfect vanilla flavor, a dreamy, creamy texture, and it’s endlessly customizable. You don’t need fancy churns, special ice cream makers, or even eggs to make this happen. All you need is a large mixing bowl, a bit of time, and a craving for something cold and sweet. If you do have the fancy equipment, here’s a recipe for ice cream using a Ninja Creami.
Once you’ve made this once, you’ll be hooked. And honestly, there’s something super satisfying about making your own ice cream at home—especially when it tastes this good and takes so little effort.
So grab your heavy cream, sweetened condensed milk, and vanilla extract, and let’s whip up something delicious. Your freezer (and your taste buds) will thank you.
Other Recipes You Will Love!
Strawberry Cheesecake Ice cream
Biscoff Greek Yogurt Cheesecake (No-Bake)
Andy Hay
Andy is the founder of ECK, Chef, and let’s admit it… the reason you’re here. He taught himself to cook, and it all paid off when he secured his spot in the season 5 Finale of Master Chef Canada. Now, Andy uses his big energy to showcase recipes that actually make people want to cook. His brand was built on butter and East Coast charm, and Andy’s kept that same energy ever since. Off-camera, you’ll find him doing what started it all: cooking for his two daughters, wife and the people he loves.
Similar recipes

Rate & leave a comment
33 Comments
— End of comments —
— No more comments to load —
This ice cream recipe was so good! Thank you for sharing it
Thanks so much, Esther! Really appreciate it!
Thank you! My husband found this recipe while we were in Mexico , now it’s our Mexican ice cream when here!
Umm I make as a gift for our friends
Love it, Carol! Let me know how it turns out!
Andy – this is the best ice cream recipe I have ever tasted. It was perfect from the first time I tried it. The first time I made it, I had some frozen bananas and no plan for what to use them in, so I defrosted them and smashed them up with a fork. OMG. I’m in love. I’ve done that a few times – always perfect! I’m sure I’ll try adding cocoa powder one day for a chocolate dream. Thank you for posting it!
Love this, Adrianne! Glad you loved it so much and the bananas sound like a dream. Thanks for sharing!
Served it with fresh berries, and it was delish!
Wonder if you wanted to make this a chocolate version, how much cocoa powder would you add to it?
So glad you enjoyed it—fresh berries sound perfect! For a chocolate version, try adding 1/4 to 1/3 cup of unsweetened cocoa powder to the sweetened condensed milk before folding in the whipped cream. Start with 1/4 cup, taste, and bump it up if you want it richer.
Simlpy delicious and creamy. I made vanilla ice cream then my kids crumbled oreo cookies as a topping.
I look forward to making more homemade ice cream.
That sounds amazing—can’t go wrong with Oreos! So glad you enjoyed it, and have fun making more ice cream!